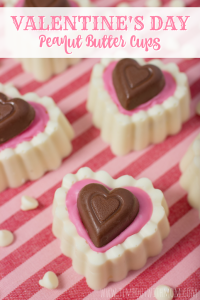
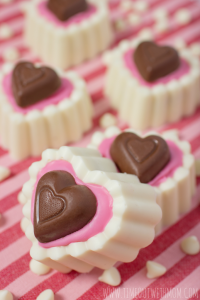
Everyone loves a little chocolate on Valentine’s Day! Sure, you can head out and buy one of those big fancy hearts, but would it mean as much as if you made something from scratch? What if I told you that you could make your own delicious peanut butter cups in less than an hour?
Bunbun was home from school yesterday, so I put her to work with me. I had a gift card left over from my Birthday back in October, so I finally used it on various items at one of my favorite cooking supply stores. Can you guess which store it is?
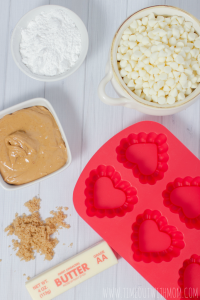
One of the items I purchased was this silicone heart mold. Most likely made for cupcakes and other decadent desserts, I used it to make these jumbo peanut butter cups. My husband loves Reese’s, but is very health conscious and really does his best to eat organic and non-GMO. While I on the other hand think food is food and chocolate is….well, CHOCOLATE!
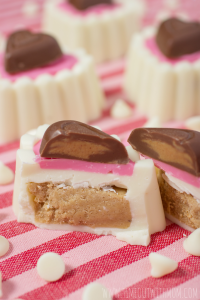
I did do my best at using all non-GMO ingredients, so I know for sure that he will appreciate these rich and not too creamy peanut butter cups. He once tried an Organic brand and complained that it was very creamy. He’s a texture kind of guy, so the grit of the store bought cups really make it for him and these are darn close!
Try making them for your family and let me know which ones you think are better! Store-bought or homemade?
Valentine’s Day Peanut Butter Cups
Ingredients
- 1 cup, creamy peanut butter
- ¼ cup, unsalted butter
- ¼ cup, brown sugar
- 1 cup, powdered sugar
- 4 cups, white chocolate chips (2 11.5 oz. bags)
- ¼ cup vegetable oil or shortening
Directions
- In a small or medium saucepan, combine creamy peanut butter, butter and brown sugar.
- Cook over medium heat and stir until melted and starting to bubble.
- Remove from heat and add powdered sugar ¼ cup at a time, stirring until completely combined with the peanut butter mixture after each add-in.
- Set aside and let cool about 10 mins.
- Melt the chocolate chips and oil/shortening together in the microwave on 50% power in 30-second increments, until melted, stirring after each session.
- Using a teaspoon or tablespoon, depending on the size of your cups; spoon some melted chocolate into the bottom of each mold to create your bottom layer. Be sure to leave enough space for your peanut butter mold and additional chocolate later on.
- Tap your molds on a hard surface to release any bubbles or air pockets.
- Use a teaspoon or tablespoon to scoop out a large portion of the peanut butter mixture. Roll it into a ball and flatten slightly into a circle or shape of your mold.
- Place on a prepared baking sheet, lined with parchment paper.
- Once finished with all of the peanut butter molds, refrigerate/freeze your chocolate and peanut butter molds for about 10-15 minutes each.
- Once cold, remove from refrigerator/freezer and place a peanut butter mold on top of each chocolate filled mold. Be sure to leave space around the sides, so your peanut butter doesn’t show through.
- Use a spoon to add more melted chocolate on top and around each peanut butter mold.
- Tap your molds on a hard surface to release any bubbles or air pockets.
- Refrigerate or freeze for another 15-30 minutes.
- Enjoy!
Storage: Finished peanut butter cups can be stored in the refrigerator or freezer. You may also keep them at room temperature in an airtight container.
